DG16 introduced 15 new fonts not found in any previous Pulse DG software. These new font files are automatically installed with DG16. For older supported versions, 14 and 15 the font files will have to be downloaded and installed for use after making a purchase as these are optional with versions prior to DG16.
This article will guide you through the process of downloading and installing the fonts; also attached is a specification sheet for each of the new fonts. **Please note, any optional font must be purchased to be used; on order processing, Pulse will issue a new license update file for your unique security device which will authorize access to the fonts purchased ** Fonts are license specific and will only be activated by the security device license they have been purchased for - two or more software licenses will require a purchase for each license to have access to new fonts.
Two files create the complete font for the Pulse software, .FON which is the font file itself and .PCX which is the icon preview for the font. Both files for a specific font should be downloaded for installation.
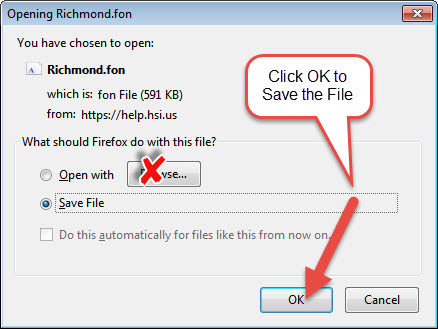
1. Left click on the files needed from this article and download them to the embroidery software computer; if Save As is an option select the Desktop as a convenient place to access; if only Save is available the files will automatically save into the Downloads folder. The font files can be saved onto a Flash Drive if the Embroidery Software computer does not have an internet connection or you have purchased the same font(s) for several licenses and will install on multiple computers.
2. After downloading all font files needed open the Windows® Explorer by clicking the folders icon in the computer task bar

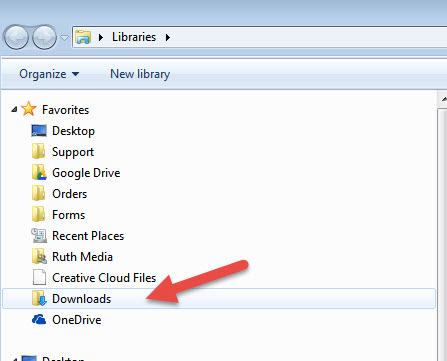
3. Click and open the Downloads folder (or other location you saved the font files to)
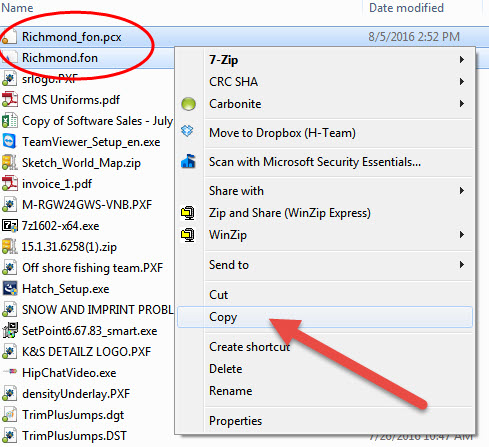
4. When the Downloads folder content displays in the file window left click the first file, hold Shift and left click the last file in the list to select all files; right click and left click Copy (this puts the files onto the clipboard for pasting into the fonts folder in a later step).
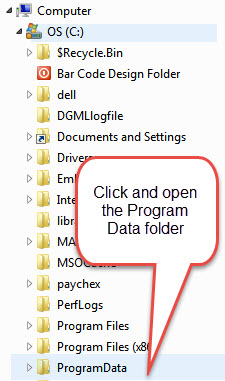
4. From the left folder window, move the slide bar to OS (C:) or This PC (Windows 10), click the arrow next to C: if the drive is not expanded so all folders are visible.
Move the slide bar to see the ProgramData folder ( if this folder is not visible it can be unhiden through Control Panel/Folder Options/View/Show Hidden Files, folders and drives)
Click the arrow next to ProgramData to expand the folder.
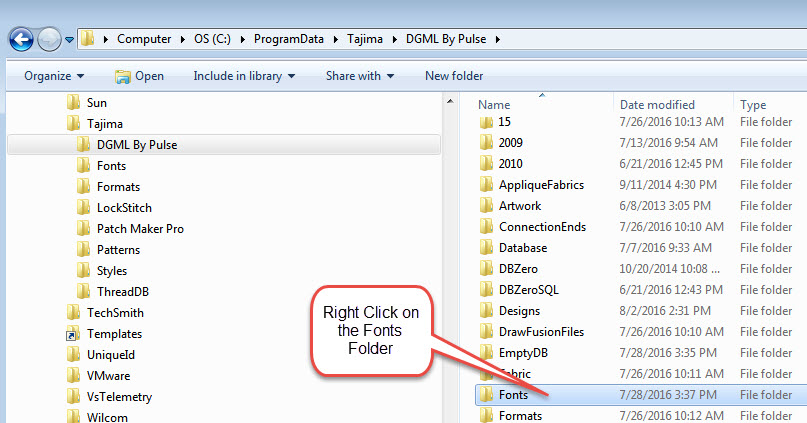
5. Click the arrow next to Tajima to expand the folder then left click DGML by Pulse to display the folders in the file window. Right Click on the Fonts folder
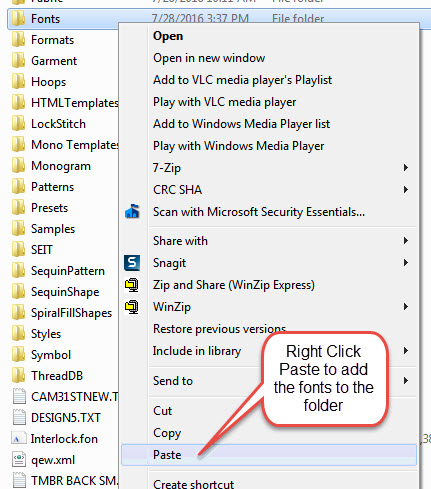
6. Left click Paste on the Options window that opens. This will add the fonts to the folder, you will not receive any message.
7. double click the Fonts folder to confirm the fonts have been added

Close the Windows® Explorer, close the DG/ML program and reopen to have access to the new fonts added to the Font folder.
Download the font specification sheets and review the available characters and minimum and maximum letter sizes recommended by Pulse for a satin segment.
0 Comments